#Girldinner
/
The social media trend #girldinner seems to be everywhere since summer 2023. The gist of it is that what women and girls make for dinner - for themselves or when their friends spend an evening together - varies wildly when they aren't cooking for their partners and kids. According to dictionary.com, the informal term girl dinner refers to a meal typically consisting of snacks, side dishes, and small portions of (often randomly assembled) foods. When Tracy searched the hashtag on Instagram and TikTok, she found macaroni and cheese served in a wine glass and lots of variations on the charcuterie board.
Adding a hashtag to some term - like girl dinner - gives new life to old trends. For as long as I (Marcia) can remember, women have gravitated toward easier foods when not having to serve a "meal" (no meat, potatoes, vegetable combo - in fact no hot foods whatsoever) every evening. When my aunts hosted bridge club in the day, for example, they served small bowls of nuts, pretzels mixes, popcorn, and maybe an easy dessert and coffee at the end of the evening. In my young professional career, women would gather at my apartment where wine, cheese, crackers, and fruit served as the centerpiece on the coffee table around which we gathered. This was the beginning of "girl dinner".
#girldinner actually is a fizzy new take on a revered tradition. We hope you enjoy our assembled ideas and add to them. Whatever is easy for you will be appreciated by your friends. You can count on that.
The Best Hummus
by Marcia Appel
I love “girl dinners” with my women friends because they are uncomplicated, unfussy, and certainly not as time-consuming as a full hot meal.
My dear friend Elizabeth shared a secret with me years ago that collapses the agony of scrambling to concoct a last-minute feast for friends or family, whether for grazing alone or with women friends, nearly a complete meal. Always, she said, keep a vat of homemade lemony hummus stored in the refrigerated, tightly sealed and guarded (because it disappears fast.)
Of course, hummus – bought from a store (and some of which are quite good) made regular appearances on my tables and kitchen islands over the years. When her recipe entered my mouth for the first time, though, I knew immediately that I would give preference to hers as often as I could, which turns out to be most of the time.
Creamy, velvety (those are not the same to me), smooth, and zingy with lemon and bathed in just the right amount of olive oil, this hummus so satisfied my body that I began to experiment with multiple uses of it, a few of which I add at the end of the recipe.
Most often, though, I do as Elizabeth taught me: I wash, peel, slice, and dice vegetables and mound them around the glistening hummus, and I watch delightedly as guests fill their pretty individual bowls and contently dip and munch. The emerald greens of broccoli, string beans, and English peas nestled in their pods; round rubies of radishes; pearly filigreed scallions; orange-glowing carrots – any vegetables you like, really.
And the other tip Elizabeth gave is to always include a pile of sliced apples, which, in a way, serve to clear the palate between biting into different veggies. This may be old hat to you, yet it surprised me in the best way possible.
Credit where credit is due: When I asked Elizabeth for her recipe it said something like: “Oh, it’s the best hummus recipe.”
“I know,” I replied, “I love it.”
“No, actually,” she said with a laugh. “It’s the actual name of the recipe.”
So, here it is, with credit to Cookie + Kate, who themselves cite (and pay homage) to renowned Israeli chef Michael Solomonov for this insight: He cooks the chickpeas used until they tenderize into near mush and uses baking soda to help the process. In 2015, Bon Appetit named his hummus its Best Dish of the Year.
The ways I change it to make my own are, well, my own. And there’s no end to the experiments you can try. I dare you.
The following recipe is from Cookie + Kate, who themselves credit renowned Israeli chef Michael Solomonov with this insight: He cooks the chickpeas used until they tenderize into near mush and uses baking soda to help the process. In 2015, Bon Appetit named his hummus its Best Dish of the Year.

Ingredients
1 can (15 ounces) canned chickpeas, rinsed and drained, or 1 ½ cups cooked chickpeas
½ teaspoon baking soda (if you’re using canned chickpeas)
¼ cup lemon juice (from 1 ½ to 2 lemons), more to taste (I like lots)
1 medium-to-large clove garlic, roughly chopped
½ teaspoon fine sea salt, to taste
½ cup tahini
2 to 4 tablespoons ice water, more as needed
½ teaspoon ground cumin
1 tablespoon extra-virgin olive oil
Any of the following garnishes: drizzle of olive oil, sprinkle of ground sumac or paprika, chopped fresh parsley
Directions
Place the chickpeas in a medium saucepan and add the baking soda. Cover the chickpeas with several inches of water, then bring the mixture to a boil over high heat. Continue boiling, reducing heat if necessary to prevent overflow, for about 20 minutes, or until the chickpeas look bloated, their skins are falling off, and they’re quite soft. In a fine-mesh strainer, drain the chickpeas and run cool water over them for about 30 seconds. Set aside (no need to peel the chickpeas for this recipe!).
Meanwhile, in a food processor or high-powered blender, combine the lemon juice, garlic and salt. Process until the garlic is very finely chopped, then let the mixture rest so the garlic flavor can mellow, ideally 10 minutes or longer.
Add the tahini to the food processor and blend until the mixture is thick and creamy, stopping to scrape down any tahini stuck to the sides and bottom of the processor as necessary.
While running the food processor, drizzle in 2 tablespoons ice water. Scrape down the food processor, and blend until the mixture is ultra smooth, pale and creamy. (If your tahini was extra-thick to begin with, you might need to add 1 to 2 tablespoons more ice water.)
Add the cumin and the drained, over-cooked chickpeas to the food processor. While blending, drizzle in the olive oil. Blend until the mixture is super smooth, scraping down the sides of the processor as necessary, about 2 minutes. Add more ice water by the tablespoon if necessary to achieve a super creamy texture.
Taste and adjust as necessary—I almost always add another ¼ teaspoon salt for more overall flavor and another tablespoon of lemon juice for extra zing.
Scrape the hummus into a serving bowl or platter and use a spoon to create nice swooshes on top. Top with garnishes of your choice and serve. Leftover hummus keeps well in the refrigerator, covered, for up to 1 week.
To this process, Elizabeth refreshes her batches every day or two by re-swirling the top and adding drizzles of additional olive oil and lemon juice. This keeps the hummus creamy and fresh tasting.
Tips for Additional Uses
Pasta sauce: Depending on the amount of pasta I’m cooking, I take several dollops of hummus and whisk in additional olive oil and lemon juice to taste. I warm the mixture in the microwave and then fold into the hot pasta, sprinkling it generously with sliced kalamata olives and red pepper flakes, again to taste.
Split a round of pita bread in half carefully with a knife so that the top and bottom crusts are separated. Place the slices in a baking dish and brown them in the oven until lightly golden. Spread hummus on each round, adding garnishes such as a jar of roasted red peppers or artichokes, drained and finely diced, or an olive tapanade. Broil for a few minutes until pita edges are deeply golden, remove, and enjoy.
Substitute this hummus for mayonnaise in egg salad.
Have fun – the variations are endless.
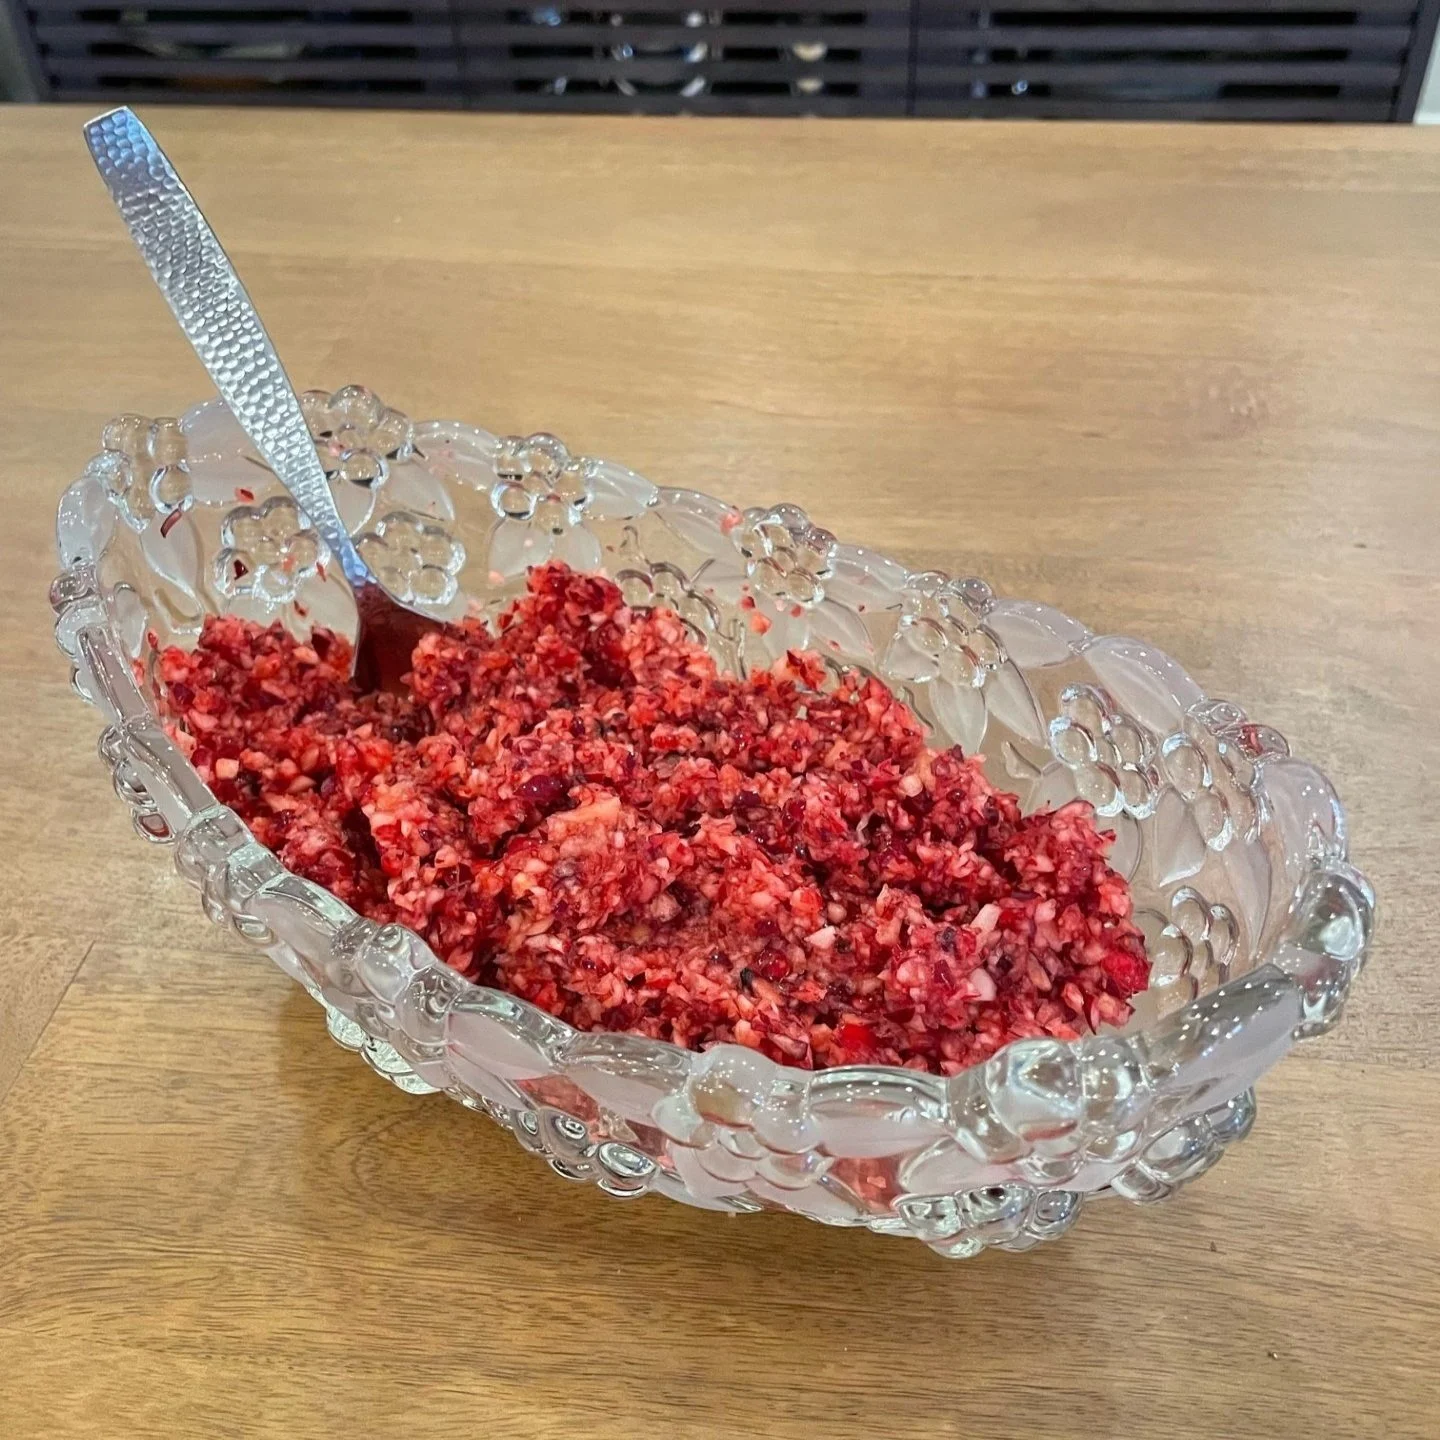
Cranberry Pepper Jelly Cheese Dip
I live in a neighborhood where twelve houses share a closed-end road. Every one of the twelve women who lives here is a friend, fun, and spontaneous. One of them dubbed us the "Queens of Kensington" and hosted a party where she handed out paper crowns. From that event grew a texting group where we ask for favors and let each other know of happenings in the 'hood. We have elaborate appetizer parties where we walk from house to house a couple of times a year.
While our next planned event isn't until March, several gals met at the mailbox (thanks, mild winter) and decided we'd get together spontaneously that very night! What fun! Oh, wait, I have to work the rest of the afternoon and won't have time to shop or cook before the appointed hour. Throwing open cupboards and searching for on-hand inspiration, my eyes fell to a jar of Mrs. Miller's Red Raspberry Jalapeno Jelly. We use this as a marinade for chicken. Tonight, it's going over a brick of cream cheese with crackers. Voila! An app fit for a queen.

Ingredients:
1 brick cream cheese
Your favorite crackers
1 jar of pepper jelly (I prefer the hot stuff as it compliments the cheese)
Instructions:
On a pretty plate, unwrap the cream cheese from it's foil packet and place in the middle.
Spread the jelly on the top and sides of the cheese, letting it drip down and pool a bit on the plate
Surround with sturdy crackers
Garnish with a sprig of rosemary if you had time to shop 🙂
Room temperature cheese helps keep the crackers from breaking, but depending on how long your queens chit-chat, it will soften on its own.
Chocolate Bark
by Amy Dirksen
Often, as husband Jeff and I play a board game or do a puzzle, we like to have what we call an assortment of "small bowls": literal small bowls, each filled with a variety of nibbles. All of the bowls have a story to them - footed "harvest gold" glass bowls that held pudding when I was growing up, vibrantly colored ceramic bowls we found as a family in Italy, clear glass bowls regifted to me from a "bonus sister."
One of the small bowl fillers I like to make is a sweet treat and is easily and endlessly customizable. (It also makes a terrific gift!)
STEP 1: Line a sheet pan with foil, parchment paper, or a (very clean) silpat. My preference is parchment paper.
STEP 2: Pick Your Ingredients:
CHOCOLATE: 1 pound total
Bittersweet
Semisweet
Milk
White
Vegan
CRUNCHY: ½ cup total - mix & match
any nut, including pine nuts
peppermints
toffee
toasted coconut flakes
chips - mini or regular size
peanut butter
chocolate
butterscotch
banana chips
freeze-dried fruit
granola
CHEWY: ½ cup total - mix & match; chop as necessary
any dried fruit, including raisins and craisins
mini marshmallows
candied fruit peel
crystallized ginger
SPICES (optional)
red pepper flakes
flaky sea salt
crushed cardamom seeds
toasted fennel seeds
crushed peppercorns - any color
thyme
STEP 3: Melt the chocolate.
Chop the chocolate into ½" pieces.
Set aside 1 cup.
Put the rest in a microwave safe bowl.
Microwave 30 seconds, then stir.
Continue microwaving, stirring at 30-second intervals until melted. This takes 3-5 minutes total.
If you prefer to use a double-boiler method to melt the chocolate, that works great, too!
Immediately add the 1 cup of reserved chocolate and stir vigorously until melted and shiny. (It's okay if there are a few small un-melted pieces.)
NOTE: Vegan chocolate is not an ingredient I work with regularly, so it may need a slightly different melting method.
STEP 4: Spread it out.
Pour the melted chocolate onto the prepared baking sheet; use a spatula to evenly spread it out into a 10-12" circle-like shape (or whatever shape you want), about ¼" thick.
STEP 5: Add your toppings.
Nicely place, rain down, scatter.... However you choose, put your chosen toppings on the chocolate, lightly pressing the crunchy and chewy ones down.
Sprinkle with spices, if using.
STEP 6: Waiting Game.
Let the bark completely harden at room temperature - this takes about an hour. Especially if you're in a hotter climate, you may need/want to finish it in the freezer for a few minutes.
STEP 7: Enjoy!
Break into pieces & enjoy!
Allegedly, this keeps in an airtight container at room temp for 1-2 weeks. Lol....